
Restaurant-quality dinners. Fully charted adventures.

Recent Posts

  • Navigating the Magic: A Family’s Guide to New York City during the Holidays

    Navigating the Magic: A Family’s Guide to New York City during the Holidays

    In early 2025, our family started talking about taking a trip to New York City during the Christmas holiday. It was my daughter’s first year of college and my son was still in middle school. We quickly realized that as the kids got older, finding the time when everyone’s schedules aligned would become increasingly difficult. Winter break was likely going to be one of our best opportunities to travel together.

    Rather than planning a trip to a tropical destination, we decided to embrace the cold and head somewhere that really comes alive during the holidays. New York City immediately came to mind. It was a destination already on our list, and experiencing the city during the magic of the holidays seemed like the perfect opportunity. Even better, we had this the idea during winter break, giving us almost a full year to plan!

    What started as a family trip for four eventually grew to seven. With a larger group, popular attractions, holiday shows, and sought-after restaurants to consider, planning ahead became especially important.

    When putting together our itinerary, I focused on a few key things: seeing major sights (especially since it was the kids’ first visit), experiencing the character of different neighborhoods, taking in the holiday magic, and of course, eat some really good food.

    The best way to do this was to organize each day around a specific neighborhood or area of the city. This helped minimize time spent traveling between attractions and allowed us to experience more of what each area had to offer.

    6 Days in NYC at a Glance

    A family trip combining iconic NYC attractions, neighborhood exploration, memorable meals, and plenty of holiday magic.

    • Trip style: sightseeing, food, neighborhood exploration, holiday experiences
    • Best for: families, first-time visitors, and holiday travelers
    • Pace: full days with planned activities, sightseeing, and meals
    • Where we stayed: NH Collection New York Madison Avenue, Midtown Mahattan
    • Planning window: Approximately one year

    Where We Stayed: NH Collection New York Madison Avenue

    Choosing the right hotel was an important part of planning this trip. With six days of sightseeing, I wanted somewhere centrally located that would make getting around the city as easy as possible.

    We stayed at the NH Collection New York Madison Avenue in Midtown Manhattan, close to Grand Central Terminal. This turned out to be a great home base for our trip. Being near Grand Central made it convenient to access the subway. We were able to get to places on our itinerary without difficulty.

    Our family of four stayed in two rooms, and we were happy with the accommodations. The rooms were adequately sized, beds were comfortable, everything was clean, and the staff was friendly and welcoming. One of my favorite touches was the lobby, which was festively decorated for the holidays. It was a great place for our family to meet up before heading out each day.

    Overall, I would recommend this hotel for anyone looking for a centrally located place to stay while exploring NYC, especially during the busy holiday season.

    Navigator Note: When visiting NYC, I would prioritize location when choosing a hotel. Having convenient subway access can make a big difference, particulary when you are planning full days of sightseeing.

    Planning Ahead: Making the Most of Our Time in NYC

    With almost a year to plan our trip, I knew I wanted to take advantage of that time to organize our days and secure the experiences we didn’t want to miss. What initially started as a family trip for four eventually grew to seven, making it even more important to have tickets, activities, and restaurant reservations arranged before we left.

    Traveling to NYC during the Christmas season means competing with plenty of other visitors for popular attractions, holiday shows, and restaurant reservations. I spent time researching our options, organizing activities by neighborhood, keeping track of ticket release dates, and making dinner reservations as booking windows opened. Having these details taken care of ahead of time made a big difference and allowed us to spend our time enjoying the city rather than worrying about availability or figuring out what to do next.

    A few planning tips I would recommend:

    • Book popular attractions early: Especially timed-entry attractions and experiences that are high on your must-see list.
    • Secure show tickets: Holiday performances are popular, so don’t wait until you arrive to purchase tickets.
    • Make dinner reservations: This becomes even more important with a larger group. Restaurants that can accommodate seven people may have fewer available seating times.
    • Plan by neighborhood: Grouping attractions and restaurants by area saves time and makes the itinerary more manageable
    • Leave some flexibility: Even with a well-planned itinerary, leave room for unexpected discoveries, shopping, and enjoying the atmosphere.

    The Complete 6 Day Itinerary

    Day 1: Arrival and First Holiday Sights

    • Sights: Flatiron Building, Union Square Holiday Market, Washington Square Park
    • Eats: breakfast at Murry Hill Diner, sandwiches from Faicco’s Italian Specialties, treats from Breads Bakery and Venchi, and dinner at La Grande Boucherie
    • Holiday Magic: Christmas Tree in Rockefeller Center and iconic Radio City Christmas Spectacular featuring the Rockettes

    Day 2: Lower East Side and Brooklyn

    • Sights: Bower Mural, Tenement Museum, Museum at Eldridge Street, Brooklyn Bridge, Dumbo
    • Eats: breakfast at Grand Central Station, pastrami and matzo ball soup from Katz’s Delicatessen, pizza at Grimaldi’s and treats from Brooklyn Ice Cream Factory
    • Holiday Magic: Christmas lights in Dyker Heights
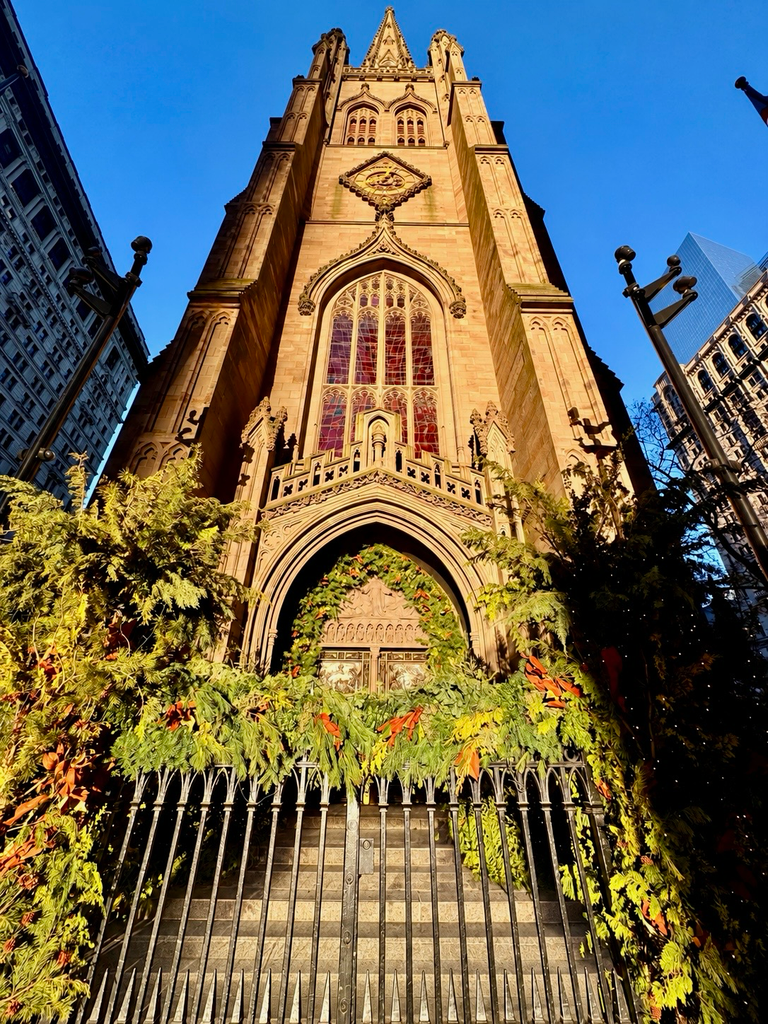
    Day 3: Statue of Liberty & Financial District

    • Sights: Statue of Liberty and Ellis Island, Trinity Church, New York Stock Exchange, 9/11 Memorial and Museum, Mercer Labs, Oculus World Trade Center
    • Eats: breakfast at Liberty Bagels, lunch at George’s, dinner at Fraunces Tavern and dessert at Ferrara Bakery & Cafe
    • Holiday Magic: Financial District’s Christmas Tree and lights on Stone Street and Little Italy

    Day 4: Upper East & West Museums and Broadway Show

    • Sights: American Museum of Natural History, The Metropolitan Museum of Art, Times Square, Broadway
    • Eats: bagels for Pop Up Bagels, hot dogs from a cart, dinner at Carmine’s and dessert from Junior’s
    • Holiday Magic: The Met’s annual Christmas tree and Neapolitan Baroque Crèche

    Day 5: Christmas Eve in Midtown

    • Sights: New York Public Library, Bryant Park Winter Village, the High Line, Hudson Yards, Macy’s
    • Eats: quick breakfast at Heritage Grand Bakery, lunch at Chelsea Market, treats at Bryant Park Holiday Shops, and dinner at Smith & Wollensky
    • Holiday Magic: Bryant Park Winter Village and Holiday Shops and window displays at Macy’s

    Day 6:Christmas Day in Central Park, Empire State and Chinatown

    • Sights: Central Park, 5th Ave, Rockefeller Center, Empire State Building, and Chinatown
    • Eats: breakfast at Carnegie Diner & Cafe, food crawl in Chinatown for lunch, dinner at Park Ave Kitchen by David Burke
    • Holiday Magic: window displays on 5th Ave and Rockefellar Center
    Day 7: Departure and Final Eats

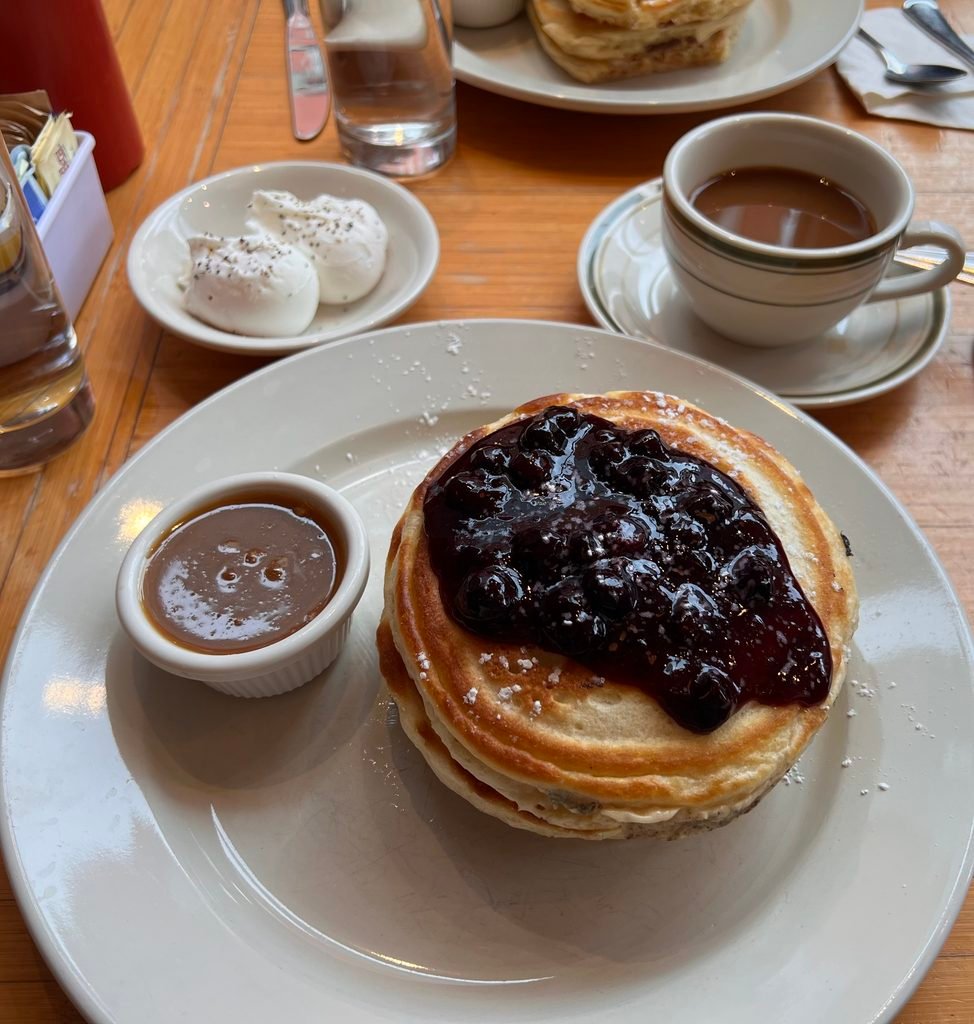
    • Eats: breakfast at Clinton Street Baking Co.

    Lessons Learned and Tips for Planning 6 Days NYC Holiday Trip

    Expect Crowds

    New York City is busy year-round, but the holiday season takes things to another level. Popular attractions, restaurants, shopping areas, and holiday displays can get especially crowded. Be prepared for longer lines, busy sidewalks, and more time navigating through the city. Having realistic expectations makes it easier to enjoy the experience rather than getting frustrated by the crowds.

    Master the Day-to-Day Travel Logistics

    Getting around NYC is part of the experience, but it helps to have a general understanding of the subway system and how to get from one place to another. I found that organizing each day around specific neighborhoods made a big difference. It minimized unnecessary travel and allowed us to spend more time enjoying the sights, food, and experiences. Also, don’t underestimate how much walking you will do!

    Plan Ahead

    This is especially important during the holidays and even more so when traveling with a larger group. Our trip became a group of seven, which made securing tickets and reservations more challenging. Popular attractions and shows can sell out, and restaurants may have limited availability for larger parties. Research what you want to do, understand when tickets become available, and make reservations early whenever possible.

    Manage Expectation and Be Mindful of Your Travel Group

    When traveling with family or a larger group, not everyone will have the same priorities, energy levels, or interests. There is a lot to see and do in NYC, but trying to fit everything into one trip can quickly become overwhelming. Prioritize the experiences that matter most to everyone, build in opportunities to rest, and be willing to adjust plans along the way. Sometimes enjoying the experience is more important than checking everything off the list.

    Don’t Overthink Your Wardrobe

    This one might sound simple, but it is worth mentioning! NYC during the holidays can be hold, and you will spend a lot of time walking outdoors. Comfortable shoes and layers are much more important than putting together a different outfit for every activity. You will also find yourself moving between cold outdoor temperatures and warm, restaurants, shops, and attractions, so being able to adjust your layers is key. Pack for comfort and the weather.

    Build in Time to Enjoy the Holiday Atmosphere

    One of the best parts of visiting NYC during the Christmas is simply experiencing the city. with so much to see and do in NYC, it is easy to fill every minute with planned activities. However, some of our favorite moments, came from simply enjoying the holiday atmosphere. Whether it was taking in the decorated storefronts, stopping for a seasonal treat, wandering through a holiday market, or just admiring the city lights, these moments were just as much a part of the experiences as visiting the major attractions. Make sure to leave a little room in your itinerary for the unexpected. You don’t want to be so focused on getting to the next destination you miss the magic happening around you.

  • Mummy Hot Dogs

    Mummy Hot Dogs

    Mummy hot dogs are fun and easy addition to a Halloween dinner. They take just a few ingredients and very little preparation, making them perfect for a busy Halloween evening. I like serving them alongside a bowl of chili for a hearty dinner before heading out for trick-or-treating. They are also fun way to make an everyday favorite a little more festive for the holiday.

    You can use traditional hot dogs or switch things up with chicken sausage. My daughter especially loves making these with chicken apple sausage. I am making a combination of both, and two sheets of puff pastry are just the right amount to wrap eight hot dogs and four chicken sausages.

    What Makes This Recipe Work

    • Simple ingredients. All you need are hot dogs or chicken sausages and puffed pastry dough to create these fun Halloween treats.
    • Easy preparation. Wrapping the hot dogs in strips of dough is simple, and they bake in the oven until golden brown.
    • Easy to customize. Use traditional hot dogs or experiment with different chicken sausages.

    Mummy Hot Dogs

    A fun and easy Halloween dinner addition made with flaky puff pastry, hot dogs, and chicken sausage. Perfect alongside a bowl of chili before heading out for trick-or-treating.
    Total Time 40 minutes
    Servings: 12
    Course: Main Course
    Cuisine: American

    Ingredients
      

    • 2 sheets of puff pastry
    • 1 pk chicken sausages
    • 1 pk hot dogs
    • 1 egg beaten

    Method
     

    1. Preheat oven to 400 degrees and line two baking sheets with parchment paper.
    2. Cut strips of each defrosted puff pastry sheet into 12 strips.
    3. Using 2 strips of puff pastry wrap each hot dog and chicken sausage. Squeeze ends of puff pastry together. Place on baking sheet and repeat with each hot dog and chicken sausage.
    4. Brush each wrapped hot dog with beaten egg.
    5. Bake in oven for 25-30 minutes or until puffpastry is golden brown and hot dogs or sausages are heated through.
  • Cincinnati Chili

    Cincinnati Chili

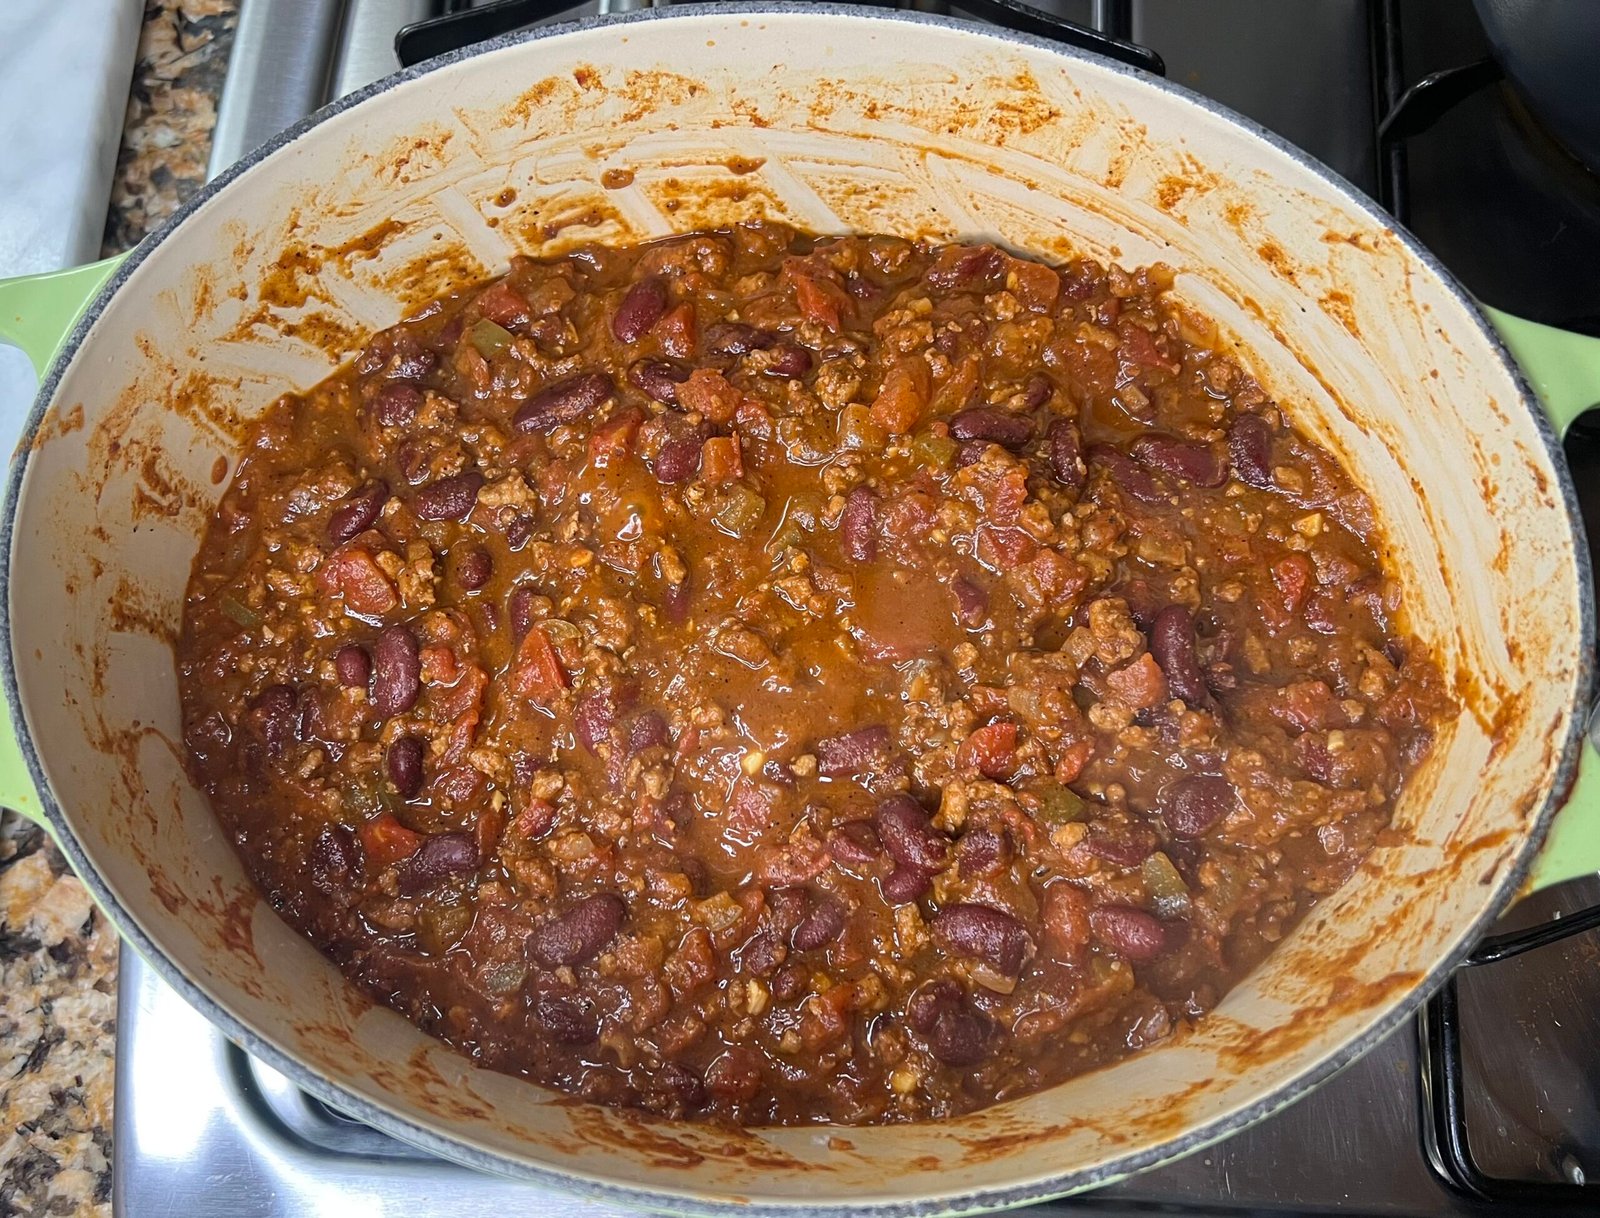
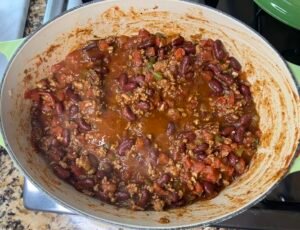
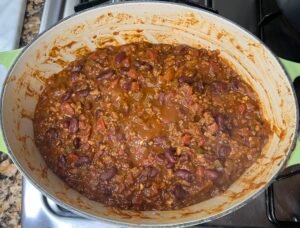
    Chili is an American favorite and a signature dish in our house during football season. It is classic family dinner that varies by family and region to region. It is also a versatile dish that allows you to play with toppings, flavors, and how you serve it. For this recipe, I am sharing my favorite go-to chili which is technically a Cincinnati-style chili recipe. However, I never serve it over spaghetti. I simply find the flavors of Cincinnati chili to be the best.

    The result is a chili that is a little different from your traditional bowl of chili. It has a rich, savory flavor with a subtle complexity that makes it stand out from other chili recipes. I like that it is still comforting, satisfying meal but has a unique flavor profile that makes it something a little different from the usual weeknight chili. It also one of those recipes that is easy to make your own depending on how you decide to serve it.

    In our house, we often serve this chili on its own with simple toppings like shredded cheese and Fritos. We also use it to make chili fries and top hot dogs, which makes for an especially fun game-night dinner. For Halloween, I serve this chili alongside mummy hotdogs. This chili is easy enough to make on a weeknight or even just before you head out trick-or-treating.

    What Makes This Recipe Work

    • Warm spices. Adding cinnamon and allspice alongside chili powder, cumin, and oregano gives this chili its unique flavor. It is just enough to know there is something different without overwhelming the chili or making the flavor seem unusual. It is perfect for fall but delicious all year long.
    • Ground turkey. Using ground turkey makes this chili feel a little lighter while still delivering plenty of flavor. It also holds up surprisingly well in this recipe, maintaining a nice texture throughout the cooking process.
    • Chocolate. Adding chocolate at the end of cooking gives the chili a subtle hint of sweetness and an added depth of flavor. It is a small ingredient that makes a difference in the finished dish. My family can always tell when I forget to add it!
    • Versatile Toppings. Whether you keep it simple with shredded cheese or add Fritos for a little crunch, the toppings let everyone make their bowl their own. You can also take it beyond a traditional bowl of chili and use it for chili fries or hot dogs.

    Cincinnati Chili

    A flavorful twist on traditional chili with warm spices and a hint of chocolate. Perfect for football season, family dinners, or serving over fries and hot dogs.
    Total Time 40 minutes
    Servings: 8
    Course: Main Course
    Cuisine: American

    Ingredients
      

    • 1 Tbsp olive oil
    • 1 lb ground turkey
    • 1 cup onion chopped (1 onion)
    • 1 cup green bell pepper chopped (1 bell pepper)
    • 4 cloves of garlic minced
    • 2 Tbsp chili powder
    • 2 tsp ground cumin
    • 2 tsp ground oregano
    • ½ tsp ground cinnamon
    • ¼ tsp ground allspice
    • 4 Tbsp tomato paste
    • 1 cup chicken broth
    • 2 15oz cans dark kidney beans rinsed
    • 2 15oz cans diced tomatoes with liquid
    • 4 oz semisweet chocolate chopped
    • Salt and pepper
    • 2 cups sharp cheddar cheese shredded

    Method
     

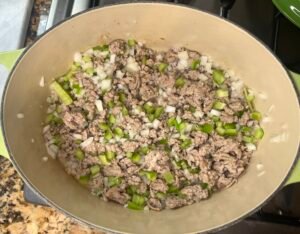
    1. Heat oil in large dutch oven over medium heat. Add ground turkey and crumble. Cook for 3 minutes or until turkey is nearly done. Add onions and green bell pepper. Season with salt and pepper. Cook until onions are translucent about 3 minutes.
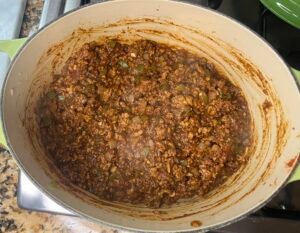
    2. Add garlic and cook for 30 seconds. Add spices and tomato sauce, and stir to combine. Cook for 1 minute.
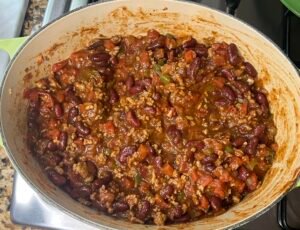
    3. Add chicken broth, kidney beans, and diced tomatoes, and stir to combine.
    4. Bring to a simmer and cook for 20 minutes until more for a sauce like consistency.
    5. Stir in chocolate and season with salt to taste.
    6. Serve with handful of shredded sharp cheese or your favorite toppings.

    Notes

    Don’t worry if your chili looks too liquidity when you add the chicken broth, beans, and diced tomatoes. As the sauce simmers the mixture will become more of a saucy consistency.
  • Bats and Cobwebs Pasta

    Bats and Cobwebs Pasta

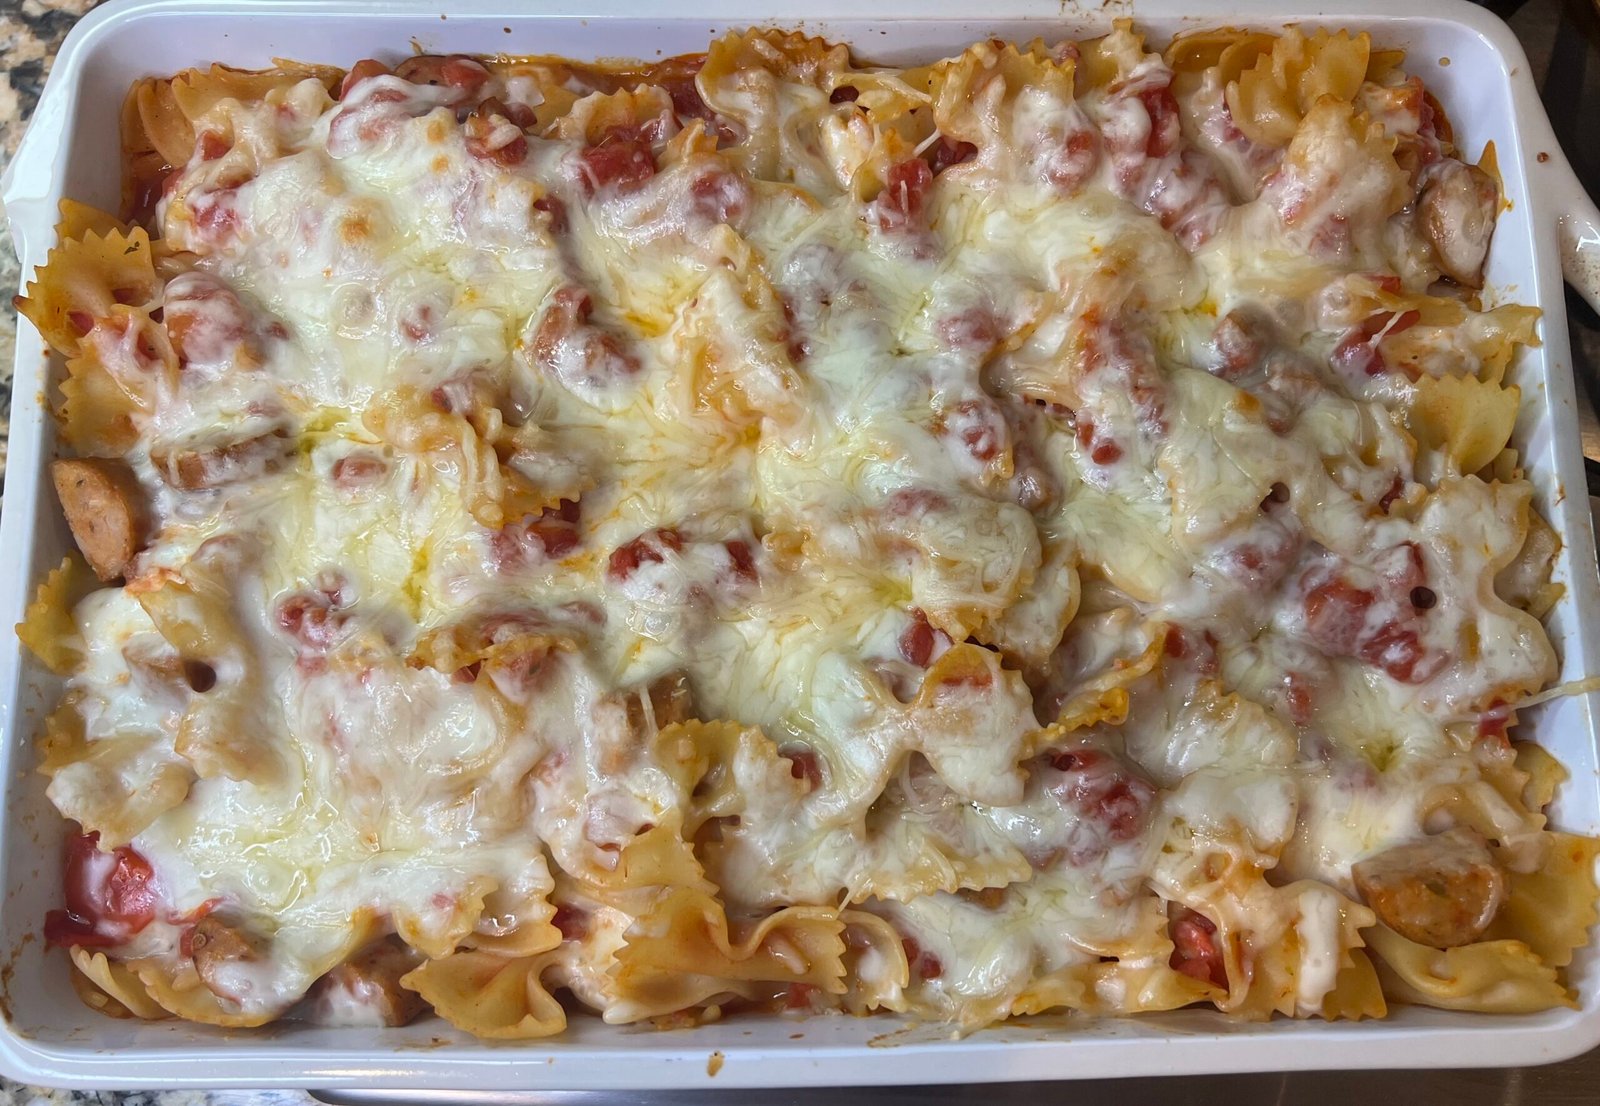
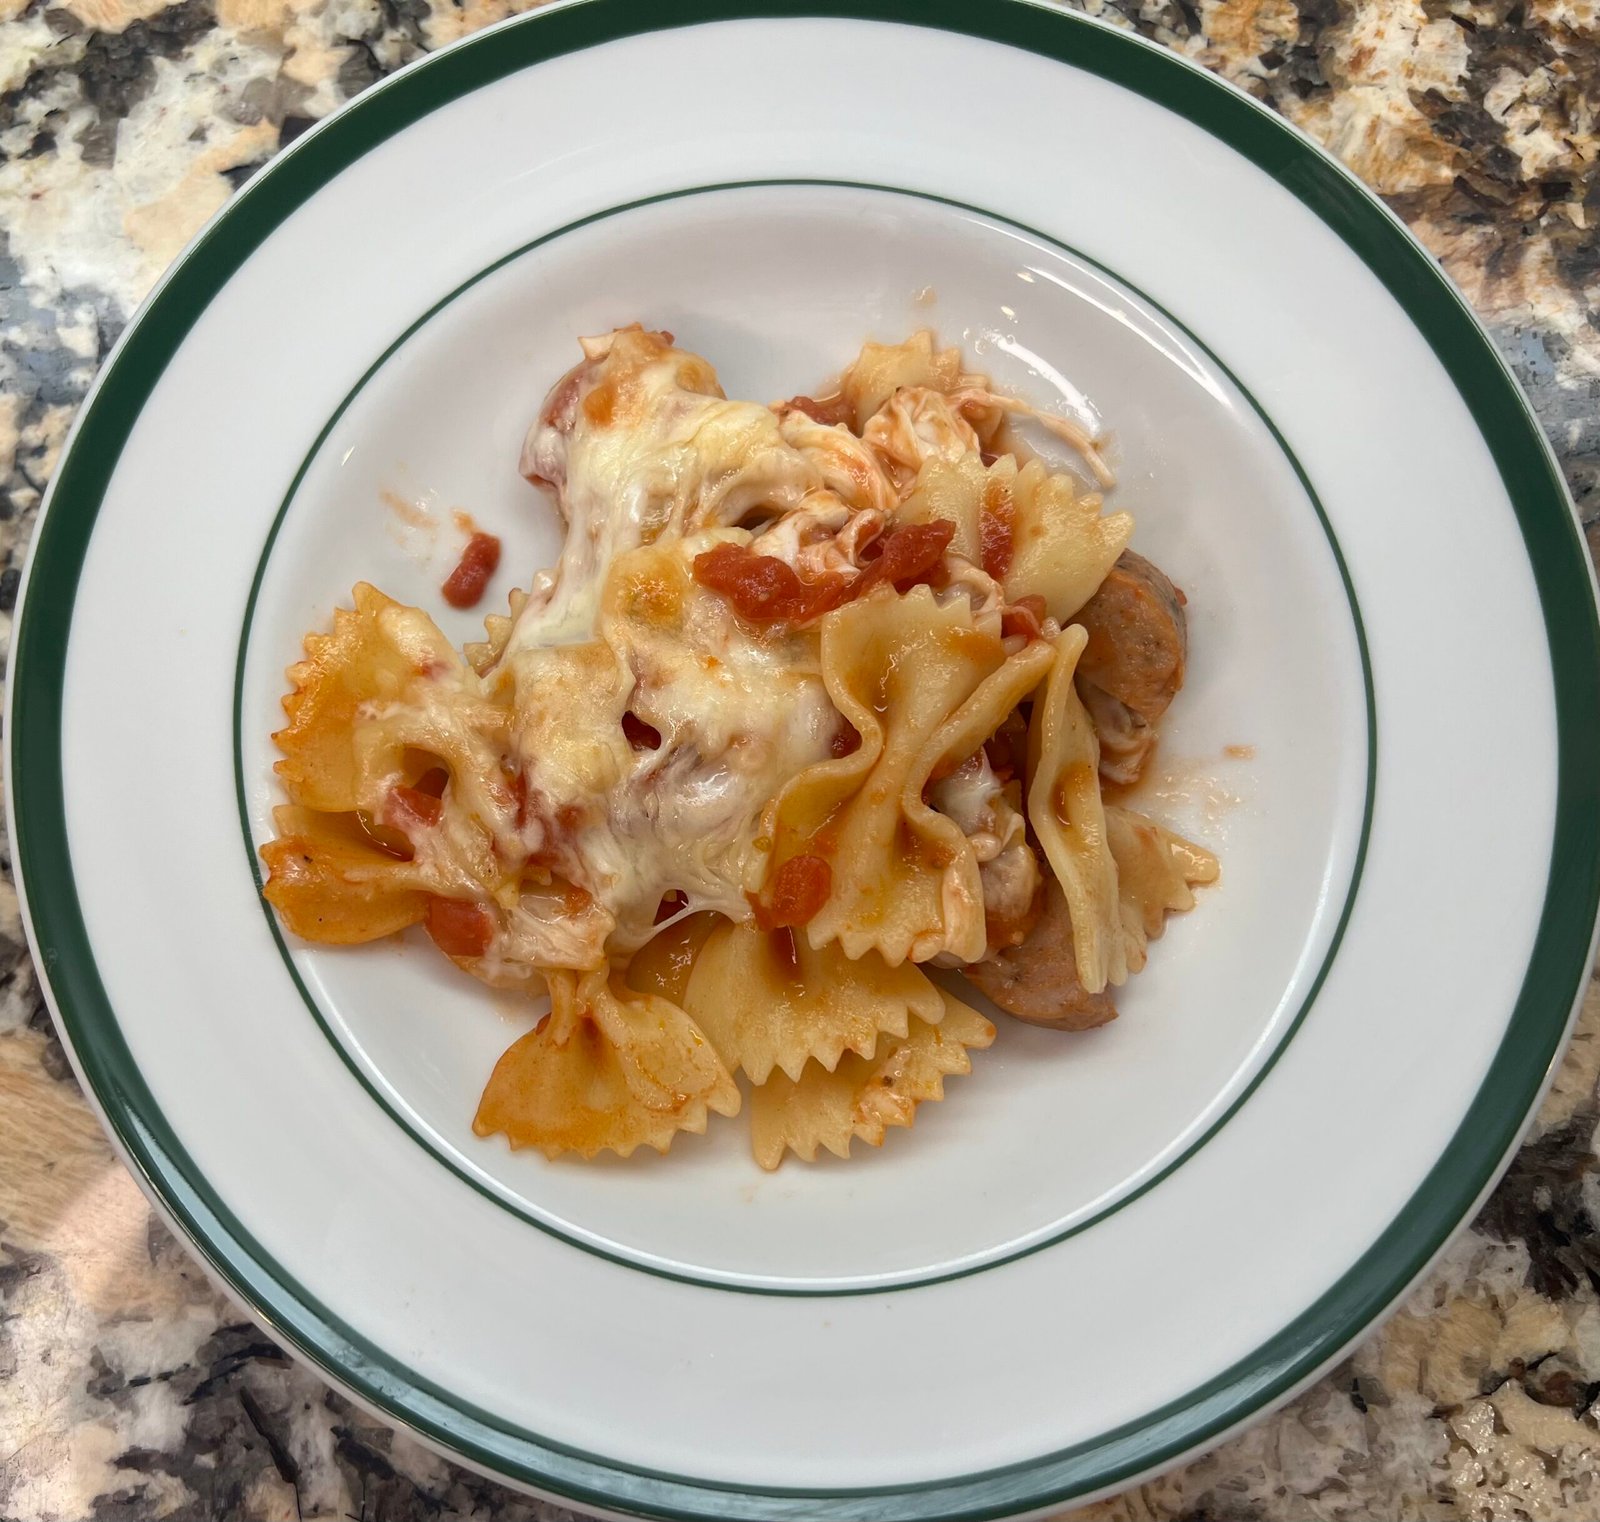
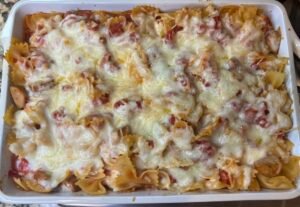
    This pasta dish is perfect for a Halloween-themed weeknight dinner. Farfalle pasta gives the dish its bat-inspired name, while the melted mozzarella creates a delicious, stretchy strands of cheese that resemble cobwebs. Beneath the festive presentation is simple yet surprisingly delicious combination of simmered tomatoes, chicken sausage, and fresh mozzarella. It is a dish the whole family can enjoy for Halloween, but it is so good that you may find yourself adding it to your regular dinner rotation.

    One of my favorite things about the recipe is how easy it is to customize the dish. You can vary the kinds of chicken sausage. You can start with Italian sausage, but also switch things up to a smokey or sun-dried tomato variety. It is a simple way to change the flavor without any additional work.

    Although this dish finishes in the oven, the preparation is quick and straightforward, making it a great option for a busy weeknight. Start with heating up the water for the pasta while you begin making the sauce. While the sauce simmers, dice the chicken sausage so it is ready to go. The sauce develops plenty of flavor and reaches the desired consistency in just eight minutes, but you can let it continue simmering on low while the pasta finishes cooking.

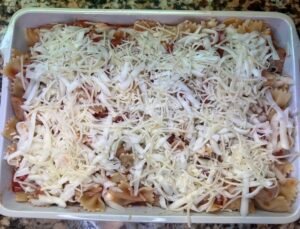
    Once everything is ready, combine the sauce with the pasta, chicken sausage, and mozzarella pearls, then transfer to a casserole dish. Top with shredded mozzarella and bake until the cheese is melted and bubbly. The result is a comforting baked pasta with plenty of cheesy goodness and a playful Halloween twist.

    What Makes This Recipe Work

    • Farfalle Pasta. Farfalle, or bow-tie pasta, gives this dish its bat-inspired name. Its compact shape also works well with the other ingredients, ensuring that the pasta doesn’t overwhelm the sausage, tomatoes, and cheese.
    • Mozzarella two ways. Using mozzarella pearls and shredded mozzarella delivers cheesy goodness in every bit. The pearls melt into the pasta, creating fantastic stretchy strings of cheese which resemble “cobwebs”, while the shredded mozzarella forms a delicious, bubbly topping.
    • Diced tomatoes. Diced tomatoes provide the base for the dish simple yet signature flavorful sauce. I like to use a combination of petite and regular diced tomatoes to add plenty of tomato flavor without letting the larger pieces overwhelm the other ingredients.
    • Pre-cooked chicken sausage. Using pre-cooked chicken sausage makes this recipe quick and convenient for a weeknight dinner. Also, it gives you flexibility to adjust the flavor of the dish by picking a variety of pre-cooked sausages that you like. The recipe calls for Italian, but you can use a smoky sausage or sundried tomato sausage too.

    Bats and Cobwebs Pasta

    A fun, Halloween-inspired pasta bake featuring farfalle “bats,” savory chicken sausage, simmered tomatoes, and gooey mozzarella “cobwebs.” This easy, cheesy dinner is perfect for Halloween but delicious enough to enjoy year-round.
    Total Time 40 minutes
    Servings: 8
    Course: Main Course
    Cuisine: Italian

    Ingredients
      

    • 1 lb farfalle pasta
    • 1 Tbsp olive oil
    • 2 cloves garlic minced
    • 2 28 oz can diced tomatoes
    • 1 tsp oregano
    • Salt
    • Pepper
    • 4 Italian pre-cooked chicken sausages diced
    • 8 oz fresh mozzarella balls pearl size is best
    • 8 oz mozzarella shredded
    • ¼ cup parmesan shredded

    Method
     

    1. Preheat oven to 400 degrees.
    2. Cook pasta according to directions and set aside.
    3. Heat Dutch oven over medium heat with olive oil. Add garlic and cook until fragrant, 30 seconds.
    4. Add diced tomatoes and oregano and season with salt and pepper. Cook on medium heat while stirring occasionally and tomatoes become a sauce like consistency, about 8 minutes.
    5. Add chicken sausage and mix into sauce. Turn heat off and add mozzarella pearls. Add pasta and stir to combine.
    6. Add pasta mixture to casserole dish. Top with shredded mozzarella and parmesan cheese.
    7. Bake for 10 to 15 minutes until bubbly and cheese is lightly browned.

    Notes

    You can use a variety of chicken sausages such sundried tomatoes, smoked bell pepper, or sweet Italian chicken sausages.
    If you can’t find fresh mozzarella pearls, you can use regular mozzarella balls and dice them into smaller pieces depending on their size.
  • Monster Meatloaf

    Monster Meatloaf

    Meatloaf is one of those classic family dinners that everyone seems to have their own favorite way of making. It’s a comforting, familiar dish made with simple ingredients you likely already have on hand. For this recipe, I am taking my favorite moist and flavorful meatloaf and giving it a fun, spooky twist by shaping it into a monster foot. The perfect centerpiece for a Halloween-themed dinner!

    I love that this recipe combines the comfort of a traditional Sunday dinner with a little Halloween fun. It’s best made on a lazy Sunday when you have time to let it bake in the oven, filling your kitchen with that wonderful home cooked aroma. Serve it alongside potatoes and your favorite vegetables to complete your Halloween-themed meal. It is a fun way to turn a family favorite meal into something a little creepy and silly.

    How to Assemble a Monster Meatloaf

    Turning my favorite meatloaf recipe into a monster foot is easier than you might think! With a few simple ingredients and a little creativity, you can transform an everyday family dinner into a fun and spooky addition to your Halloween-themed dinner.

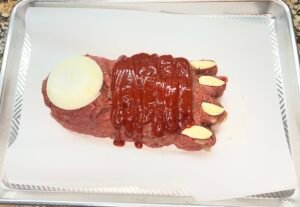
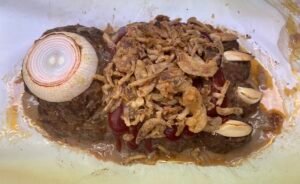
    Start by shaping the meatloaf into a log, making one end taller and thicker than the other to create the shape of a foot. Use fingers or a knife to shape four or five toes at the lower end. Keep in mind that you want the meatloaf to cook evenly, so try not to make the different sections vary too much in thickness. You just need enough definition to give it that monster-foot appearance.

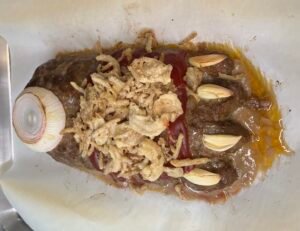
    At the top of the foot, add a chunk of onion to resemble an exposed bone. For the toenails, use small cloves of garlic or cut large cloves into smaller pieces and position them at the end of the toes. These little details really bring the monster foot to life!

    Before placing in the oven, spread ketchup over the meatloaf. For an extra creepy effect, add a little ketchup around the onion bone to give it a bloody appearance. After all, what’s a monster foot without a little Halloween gore?

    Finally, sprinkle crispy French friend onions over the meatloaf during the last 15 minutes of cooking. Not only do they add a delicious crunch and wonderful flavor that complements the meatloaf, but they look like scraggly hair of a monster’s foot. It is a fun finishing touch that makes this Halloween dinner both a delicious and delightfully creepy!

    What Makes this Recipe Work

    • Pre-cooked onions. I like to cook the onions before adding them to the meat mixture. This brings out their natural sweetness and adds a wonderful caramelized onion flavor to the meatloaf. It also helps keep the meatloaf moist and tender. It’s an extra step that I think is well worth the effort.
    • Worcestershire sauce. This sauce adds moisture and enhances the beef flavor, giving the meatloaf a richer, more savory taste. It is a classic ingredient in traditional meatloaf recipes and one I would not skip.
    • Crispy French fried onions. Even when not making a monster foot, I like adding French fried onions at the of the cooking process. It really adds great texture and enhances the onion flavor in the meatloaf.
    • Classic ketchup topping. A simple ketchup glaze provides a sweet and tangy contrast to the savory meatloaf and crispy French fried onions, creating a delicious, flavorful topping as the meatloaf bakes.

    Monster Meatloaf

    A spooky Halloween twist on classic meatloaf, topped with a sweet and tangy ketchup glaze and crispy French fried onions for a creepy, delicious finish.
    Prep Time 20 minutes
    Cook Time 1 hour 15 minutes
    Servings: 8
    Course: Main Course
    Cuisine: American

    Ingredients
      

    • 1 Tbsp olive oil
    • 1 cup onion chopped (about 1 onion)
    • 1 tsp dried thyme
    • 1 tsp salt divided
    • 1 tsp pepper divided
    • 3 Tbsp Worcestershire sauce
    • 1/3 cup chicken or beef broth
    • 1 Tbsp tomato paste
    • 2 eggs
    • ½ cup dry breadcrumbs
    • 2 lbs ground beef
    • ½ cup ketchup
    • 1 inch thick slice of onion
    • 2 cloves garlic
    • ½ cup French fried onions

    Method
     

    1. Preheat oven to 325 degrees.
    2. Heat oil in nonstick skillet. Add chopped onion and season with ½ tsp salt and ½ tsp pepper. Cook over medium heat stirring occasionally until onions are translucent and start to brown, about 5 to 8 minutes. Remove from heat and add to mixing bowl.
    3. Add Worcestershire sauce, broth, tomato paste, thyme, and remaining salt and pepper. Mix to combine.
    4. Once mixture is cooled, add eggs and breadcrumbs and combine into wet mixture.
    5. Add ground beef and combine with wet mixture try to avoid overworking the mixture as much as possible.
    6. Shape mixture into a loaf on a parchment lined baking sheet. Then continue to shape into a foot. Add sliced onion piece, cloves of garlic, and spread on ketchup.
    7. When meatloaf only has 15 minutes remaining of cooking time, remove from over and add French fried onions. Then place back in oven and complete baking time.
    8. Bake for 1 to 1 hour and 15 minutes, until the meatloaf has an internal temperature of 160 degrees and the meatloaf is cooked through.

    Notes

    For the broth, you can use either chicken or beef, whatever you conveniently have on hand.
  • Halloween Sugar Cookies

    Halloween Sugar Cookies

    These cookies are the longest standing Halloween tradition in our house, dating back to when my daughter was in preschool. This recipe makes a generous number of cookies, so it definitely helps to have some extra hands, especially when it comes to frosting and decorating. It has always been a group effort that sometimes extends to aunts, friends, and grandmas. As my kids have gotten older, they may not help as much as they once did, but they still always contribute.

    The cookies are easy to make but time consuming, making them perfect for weekend baking project. The dough comes together quickly but needs to chill in the refrigerator before being rolled out and cut into your desired shapes. Rolling the dough, cutting into shapes and baking the cookies becomes quite the assembly line. Fortunately, the cookies don’t take long in the oven so the process moves along smoothly.

    I recommend setting aside a large counter space or table for the cookie decorating. I usually cover our dining table or kitchen island in foil and place the cookies there to cool. The cookies will still be soft when they first come out of the oven, so I let them cool briefly on the baking sheet before transferring them to the decorating area.

    Depending on how many helpers I have, I set up this workspace with frosting and an assortment of sprinkles. If you have a few helpers, I recommend making the frosting before you start baking the cookies. Since the cookies cool quickly, everyone can start decorating while you finish baking the remaining cookies. To make things extra fun, divide the frosting into separate bowls and add food coloring to create a variety of colors.

    These cookies are especially perfect for fall thanks to their distinct flavors. Cinnamon, nutmeg, and brown sugar give the cookies a warm sweetness that fits the season beautifully. The frosting adds just the right amount of sweetness. I will admit that I have occasionally used store bought frosting when I am short on time, but homemade frosting is worth the extra effort because it as it tastes so much better than anything at the store. A hint of almond extract in the frosting gives it that special something while keeping the amount to one half teaspoon ensures that the flavor doesn’t overpower the cookies.

    What Makes This Recipe Work

    • Cinnamon and nutmeg. These warm spices give the cookies a distantly fall flavor, making these perfect for Halloween.
    • Brown and granulated sugar. Using both sugars adds depth of flavor and gives the sugar cookies their distinct taste.
    • Baking powder. Helps create a tender cookie that is ideal for decorating.
    • Buttercream frosting. Adds just the right amount of sweetness while providing the perfect canvas for festive sprinkles.

    Halloween Sugar Cookies

    Soft, warmly spiced sugar cookies made with cinnamon, nutmeg, and brown sugar, topped with sweet buttercream frosting and festive sprinkles.
    Total Time 2 hours 30 minutes
    Servings: 48 cookies
    Course: Dessert
    Cuisine: American

    Ingredients
      

    • Cookies
    • 1 1/3 cups unsalted butter room temperature
    • ¾ cup granulated sugar
    • ¾ cup brown sugar firmly packed
    • 2 large eggs
    • 2 tsp vanilla
    • 3 ½ cups all-purpose flour
    • 2 tsp baking powder
    • 1 tsp ground cinnamon
    • 1 tsp ground nutmeg
    • ½ tsp salt
    • Frosting
    • ½ cup unsalted butter room temperature
    • 3 to 5 Tbsp milk
    • 4 cups powdered sugar
    • ¼ tsp salt
    • ½ tsp almond extract
    • 1 tsp vanilla extract
    • Food coloring optional
    • Sprinkles optional

    Method
     

    1. Cookies
    2. Prepare your dry ingredients by adding into a separate mixing bowl, the flour, baking powder, cinnamon, nutmeg, and salt. Whisk until well combined.
    3. In a separate bowl with a stand or hand mixture, add butter and both sugars. Using your mixer, cream these together until well combined. Add eggs one at a time and incorporate into mixture. Add vanilla and blend into mixture. Make sure to scrap down sides of bowl with a spatula along the way.
    4. Mix the dry ingredients into the wet ingredients until just blended. You do not want to over mix. You can scrape down the side of the bowl and do one more quick mixing of the ingredients if needed.
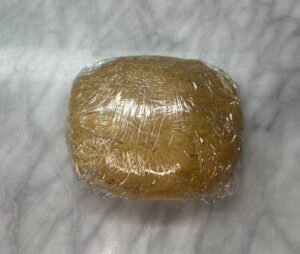
    5. Divide dough into three portions and wrap in plastic wrap. Chill in refrigerator for 45 minutes or up to 2 days.
    6. When ready to bake, preheat oven to 350 and line baking sheets with parchment paper.
    7. Working with one portion of the dough at a time, remove from plastic wrap and set on floured work surface and roll out dough to ¼ inch thickness. Use cooking cutters to make desired shapes. Transfer to parchment lined baking sheets and place one inch apart. Repeat with remaining dough by gathering scraps and pressing them together into a ball, and repeat these steps until scraps are completely used. Repeat with remaining chilled rounds.
    8. Place pans in preheated oven and bake for 8 or 9 minutes or until cookies are brown on edges and firm. If baking more than one baking sheet at a time, rotate in oven halfway through cooking time. Cool on sheets for 1 minute and then on cool surface. Cool sheets before filling with more cookies.
    9. Frosting and decorating cookies
    10. In a large mixing bowl, cream butter with mixer until smooth. Add 1 cup of powdered sugar, milk, and salt. Beat to combine.
    11. Add remaining sugar, almond extract, and vanilla. Beat to combine.
    12. Add additional milk until well combined and mixture is desired consistency.
    13. Spread or use piping bag to frost cookies. Top with sprinkles immediately. Allow frosting to harden before storing.

    Notes

    Can be stored at room temperature in an airtight container for one week.
    You can divide and add food coloring to frosting as desired.
  • Weekly Menu: October 26th

    Weekly Menu: October 26th

    Welcome to this week’s family menu rotation. We occasionally have special weeks when the menu features a particular theme, and since we love Halloween in our house , we are embracing it with some of our favorite Halloween-themed dinners. Even during a themed week, I still follow my Meal-Planning Formula. As usual, this week’s layout starts on Sunday with a more time consuming, scratch-made dinner and moves through a balanced mix of dishes designed to provide variety, use what is in season, and keep the family happy.

    The Navigation Plan for this Week

    • The Calendar (Rule 1) – As mentioned above, this week includes some of our favorite Halloween-themed dinners. One is our family-favorite turkey chili recipe which I am making extra festive by serving it alongside hot dog mummies. I am saving this meal for Halloween night so my kids can enjoy something hearty and nutritious before heading out with friends.
    • Keeping it Varied (Rule 2) – Even though we are embracing Halloween this week, I am still mixing in meals from our regular rotation to keep the menu balanced. Monster meatloaf, bats and cobwebs pasta, and turkey chili with hot dog mummies bring plenty of Halloween fun to the dinner table, while simple tacos, beef and broccoli, and a pizza night round out the week with familiar, easy options. This way, we can enjoy the holiday throughout the week without every dinner a themed event or adding extra work to an already busy schedule.

    The Formula-Driven 7-Day Menu

    • Sunday (Formula: Sunday Dinner)
      • Dinner: Monster Meatloaf with roasted carrots and smashed potatoes
      • Navigator Note: This meatloaf is as fun and frightful as it is tasty! While the preparation is pretty straightforward, it does take some time in the oven, making it a perfect dinner for Sunday night.
      • Recipe Status: Full Recipe Card Available!
    • Monday (Formula: Noodles & Pasta)
      • Dinner: Bats and Cobwebs Pasta with simple Caesar salad
      • Navigator Note: This pasta recipe is usually only made once a year, but honestly, it’s so good that I could easily add it to our regular rotation! The sauce comes together with just a few ingredients before being combined with noodles, cheese, and chicken sausage and finished in the oven for a comforting, flavorful dinner.
      • Recipe Status: Full Recipe Card Available!
    • Tuesday (Formula: Family Favorite)
      • Dinner: Carne Asada and Polo Asado Tacos
      • Navigator Note: Sprouts, our go-to grocery store, sells delicious and convenient pre-marinated carne asada and pollo asado. We grill both meats and serve them with a variety of toppings, along with simple beans and rice, for an easy and flavorful dinner.
    • Wednesday (Formula: Rice & Bowls )
      • Dinner: Beef and Broccoli
      • Navigator Note: This is my go-to recipe for beef and broccoli! Natasha’s Kitchen has a great version that I love making at home when we’re craving takeout-inspired flavors.
      • Recipe Status: Full Recipe Available at Natash’a Kitchen
    • Thursday (Formula: Leftovers)
      • Dinner: Mix and match any remaining items from the previous dinners
      • Navigator Note: Leftover night is an easy way to use up meals from earlier in the week. It keeps dinner simple on a busy night while making the most of the meals we’ve already prepared.
    • Friday (Formula: Wildcard – Dinner out)
      • Dinner: Pizza Night
      • Navigator Note: After a busy week, Friday is the perfect night to take a break from cooking. I’m planning ahead to order or pick up pizza for an easy dinner that lets us kick off the weekend with minimal effort.
    • Saturday (Formal: Family Favorites; Seasonal)
      • Dinner: Cincinnati Chili with Mummy Hot Dogs
      • Navigator Note: A warm, seasonal chili that is perfect for a hearty and nutritious dinner before heading out trick-or-treating. Hot dogs wrapped in puff pastry add a fun, festive touch that makes the meal extra special for Halloween.
      • Recipe Status: Full Recipe Card Available!

    Baking Treat: Halloween Sugar Cookies!

    No Halloween week is complete without something sweet! These Halloween Sugar Cookies are a fun, festive treat to enjoy throughout the week.

  • Bolognese

    Bolognese

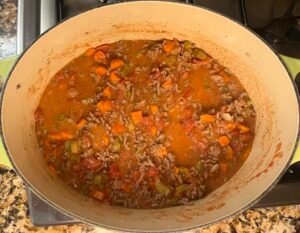
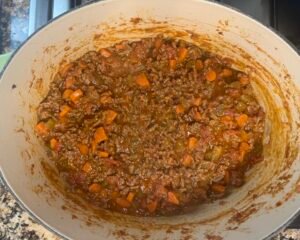
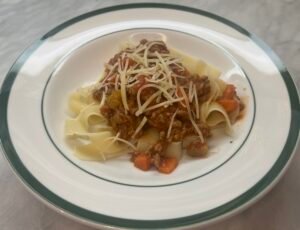
    Bolognese is best made when you have time to devote to the kitchen. It require some dedicated hands-on time at the beginning, but once the sauce gets going, it needs much less attention. However, you do need to be around to keep an eye on it. The recipe itself is not difficult, but the flavors develop with each step of the process, so it is important not to rush or skip steps. This is also one of those recipes where I would not alter the ingredients, as each one contributes to the final flavor.

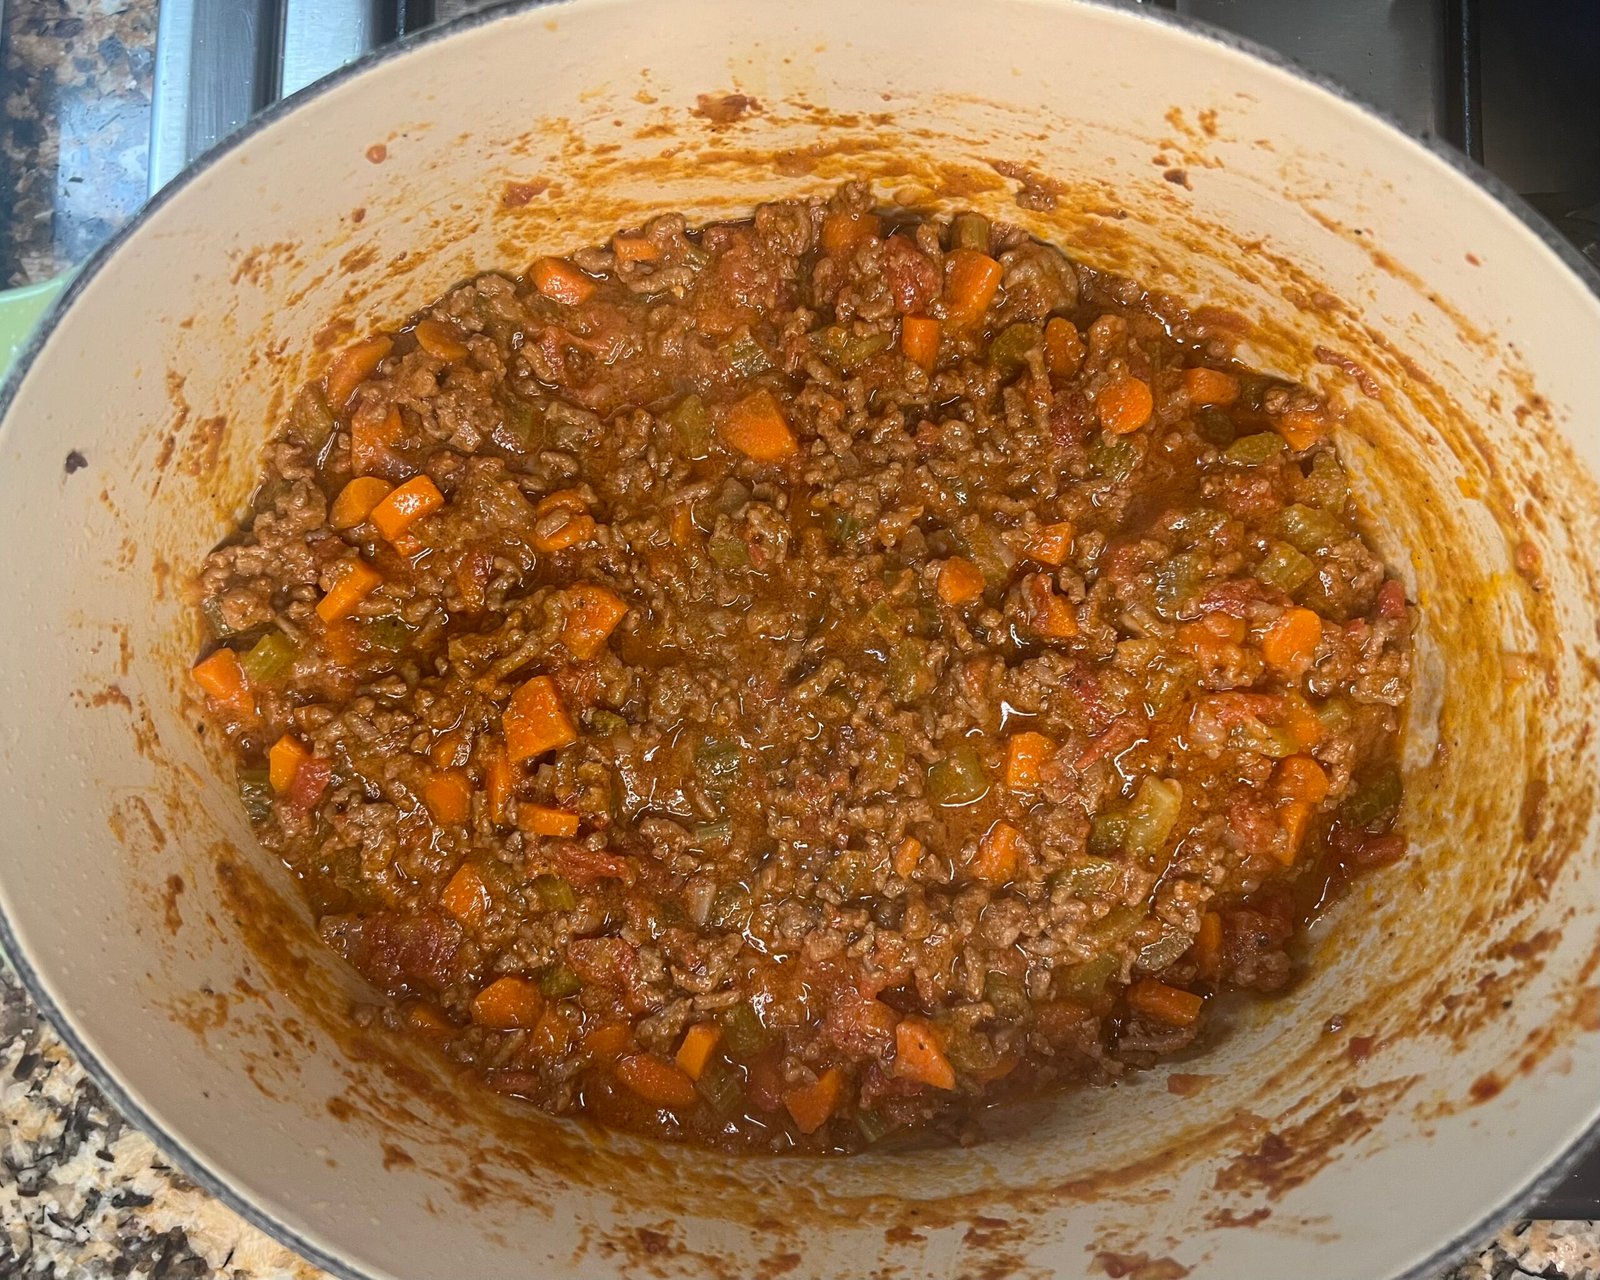
    When making Bolognese, follow the steps of as written and allow the milk and then the wine to be fully absorbed or reduced before adding the tomatoes. It is super important to season with salt and pepper along the way. During the long, final simmer, don’t worry if it seems you are adding a lot of water. The water keeps the sauce from drying out during the extended cooking time, allowing the flavors to continue to develop without the sauce becoming too thick.  

    This is another recipe inspired by our trip to New York City. We didn’t have Bolognese at any particular restaurant, but I was inspired by the meals we enjoyed that showcased simple, quality ingredients transformed into something special through time and care. From bagels at Pop Up Bagels, pastrami at Katz’s, pizza at Grimaldi’s and pork buns at Mei Lai Wah, each meal you could tell was a labor of love. Bolognese captures the same spirit: familiar ingredients, a little patience, and a dish that rewards the time you put into it.

    What Makes This Recipe Work

    • Diced carrots, celery, and onion. This classic combination, known as mirepoix, creates the foundation for the sauce. Cutting the vegetables into evenly sized pieces helps them cook consistently. I prefer a small dice that allows the vegetables to soften and blend into the sauce without disappearing completely.
    • Add nutmeg with the milk. Do not skip adding nutmeg with the milk. The nutmeg adds a touch of nutty earthiness that compliments the milk and richness of the meat without overpowering the other flavors
    • White wine you enjoy drinking. The wine adds depth and complexity while balancing the richness of the meat and vegetables. As it reduces, its flavor becomes concentrated and helps build the foundation for the tomatoes that follow.
    • Quality Italian tomatoes. Tomatoes play a supporting role in this dish rather than serving as the main ingredient, so their quality matters. Quality Italian tomatoes have a good, balanced flavor that compliment the richness of the flavors developed earlier in the cooking process.

    Bolognese

    A rich, slow-simmered sauce made with simple, quality ingredients that develop into a deeply flavorful, comforting sauce. Perfect for a leisurely Sunday in the kitchen.
    Total Time 4 hours
    Servings: 8
    Course: Main Course
    Cuisine: French

    Ingredients
      

    • 1 Tbsp olive oil
    • 3 Tbsp unsalted butter
    • ¾ cup onion diced
    • 1 cup carrot diced
    • 1 cup celery diced
    • 1 lb ground beef
    • 1 cup whole milk
    • Pinch nutmeg
    • 1 cup white wine
    • 1 ½ cups chopped Italian tomatoes in sauce
    • Salt
    • Pepper
    • 1 lb pasta such as pappardelle
    • ½ cup Parmesan cheese grated

    Method
     

    1. Heat oil and butter in a Dutch oven. Add onion, carrot, and celery. Season with salt and pepper. Stir to coat. Cook until onions are translucent for about 5 minutes.
    2. Add ground beef and season with salt and pepper. Mix into vegetables and cook until beef is mostly cooked, about 3 minutes.
    3. Add whole milk and dash of nutmeg. Stir and simmer until most of liquid has been absorbed for about 10-15 minutes.
    4. Add wine and stir to combine. Cook at a simmer until most of the liquid has been cooked off for about 10-15 minutes
    5. Add tomatoes with sauce and stir to combine. Season with salt and pepper.
    6. Continue to cook for 2 ½ to 3 hours uncovered at a low simmer. Stir often and add ½ cup as needed when most of the liquid has cooked off. Do not add additional water last 15 minutes of cooking.
    7. During last 30 minutes of cooking. Heat another pot with water and cook pasta according to instructions.
    8. Serve Bolognese on top of pasta and top with small handful of parmesan cheese

    Notes

    Important to season with salt and pepper along the way. This builds flavor as you go.
  • Weekly Menu: October 11th

    Weekly Menu: October 11th

    Welcome to this week’s family menu rotation. Following my Meal-Planning Formula, this week’s layout starts on Sunday with a more time consuming, scratch-made dinner and moves through a balanced mix of dishes designed to provide variety, use what is in season, and keep the family happy.

    The Navigation Plan for this Week

    • The Calendar (Rule 1) – This week is a bit of a mix when it comes to activities. My son has a game on Tuesday so I am starting the week off with bigger, heartier dishes that we will provide leftovers for an easy dinner and possibly a few lunches. We also have appointments later in the week so I am planning simpler dinner to make getting food on the table less stressful. And on Friday night, we are going to treat ourselves to dinner out somewhere everyone enjoys.
    • Keeping it Varied (Rule 2) – This week’s menu brings together a variety of cuisines, proteins, and cooking styles to keep dinner interesting throughout the week. From a slow-simmered Sunday Bolognese and family-favorite butter chicken to quick burritos, fresh shakshuka, and a seasonal pork chop dinner, each night offers something a little different.

    The Formula-Driven 7-Day Menu

    • Sunday (Formula: Sunday Dinner; Noodles & Pasta)
      • Dinner: Bolognese
      • Navigator Note: A time-consuming dish that is worth the extra effort. Once the sauce has reached its final, long simmer, it requires much less attention, making this a great choice for a Sunday dinner.
      • Recipe Status: Full Recipe Card Available!
    • Monday (Formula: Family Favorites; Rice & Bowls)
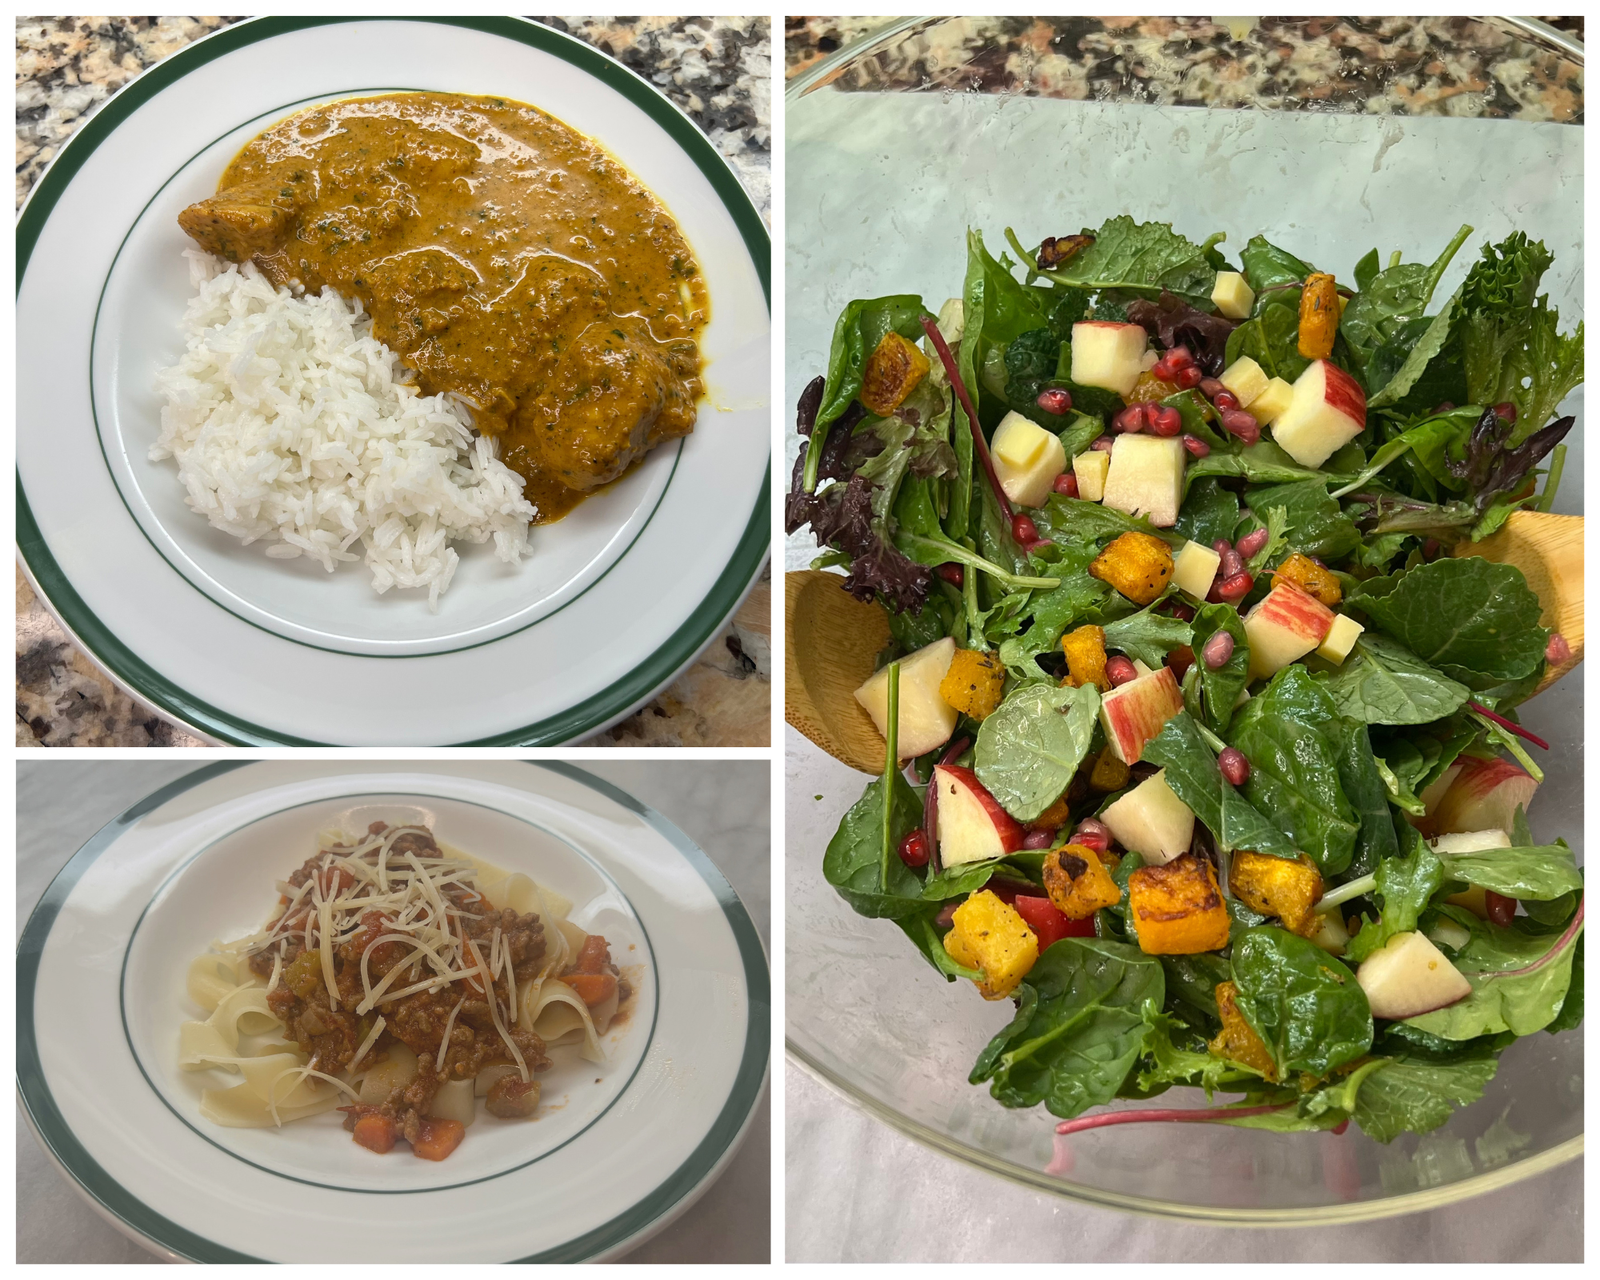
      • Dinner: Butter Chicken (adapted from Gordan Ramsey’ s Curry in a Hurry)
      • Navigator Note: Butter chicken is a family favorite in our house. This big batch adaptation ensures that we have leftovers to enjoy throughout the week.
      • Recipe Status: Full Recipe Card Coming Soon!
    • Tuesday (Formula: Leftovers)
      • Dinner: Mix and match any remaining items from the previous dinners
      • Navigator Note: Strategically placed on a busy night, leftover night gives us a easy dinner while also making sure we’re putting the first two meals to good use.
    • Wednesday (Formula: Rice & Bowls)
      • Dinner: Chicken Black Bean Burritos and Spanish Rice
      • Navigator Note: Utilizing rotisserie chicken and canned black beans as the base makes these burritos quick to assemble. Homemade Spanish rice isn’t essential, but it adds a little something extra and makes the meal feel more complete.
      • Recipe Status: Full Recipe Card Coming Soon!
    • Thursday (Formula: Fresh and Lighter Eats)
      • Dinner: Shakshuka
      • Navigator Note: A quick an easy dinner that tastes like it takes more time that it does. Using eggs as the protein also means I can buy the ingredients earlier in the week without worrying about fresh meat needing to be used right away.
      • Recipe Status: Full Recipe Card Coming Soon!
    • Friday (Formula: Wildcard – Dinner out)
      • Dinner: Dinner out
      • Navigator Note: This week is especially busy so building in flexibility to pick up or eat out at somewhere easy and fun. Perfect for a long week.
    • Saturday (Formal: Seasonal)
      • Dinner: Pork Chops and Harvest Salad
      • Navigator Note: A seasonal dinner is a great way to round out the week, bringing a fresh, fall-inspired meal to the table after a busy few days.
      • Recipe Status: Full Recipe Card Coming Soon!

  • Slow Cooker Pulled Pork

    Slow Cooker Pulled Pork

    This is one of my family’s favorite recipes and has been in our regular rotation for years. It never loses its appeal. It is incredibly easy to make and consistently delicious, making it the perfect meal at the end of a busy day.

    While pork shoulder is the ideal cut of meat for making pulled pork regardless of your cooking method, I think it really shines in the slow cooker. In fact, most of my slow cooker recipes feature pork shoulder. My husband often buys a large one, cuts it into different smaller portions of varying sizes, and freezes them. This makes it super easy to add meals involving pork shoulder to our menu rotation without having to go to the store and hope they have a cut in just the right size I need.

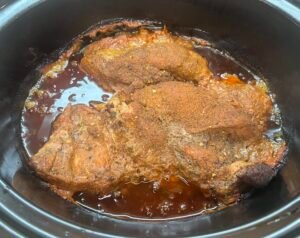
    A simple rub of barbecue spices can be prepared first thing in the morning or even a day ahead to save time. I usually make it the night before and store it in a glass container. In the morning, simply place the pork shoulder in your slow cooker and generously coat all sides with the rub. Next, you combine the ingredients for braising liquid and pour it around the pork shoulder rather than directly over it to help keep the rub in place. Cover and let cook while you are at work or out and about.

    Once you get home, the pork is ready, and you can quickly prepare the tangy homemade barbecue sauce which only takes a few minutes to cook. Shred the pork, and toss or top with sauce, and dinner is ready!

    We typically serve pulled pork as sandwiches, piled generously onto a warmed ciabatta roll with the barbecue sauce and add a slice of smoked Gouda. The cheese’s slightly nutty and creamy flavor complements the pulled pork perfectly, which makes for a delicious sandwich. If you want to keep things on the healthier side, you can skip the bread and serve the pork over roasted or mashed sweet potatoes with or without cheese. It’s delicious. We usually serve it with simple sides to keep things easy such as a simple green salad, steamed green beans, or roasted carrots and sweet potatoes.

    What Makes This Recipe Work

    • Pork shoulder loves slow cookers. As mentioned above, my slow cooker and a pork shoulder are best friends. The slow cooker allows the pork to breakdown while cooking while keeping its integrity and not becoming too dry. The long cooking time also gives the pork plenty of opportunity to develop flavor from the spice rub and braising liquid.
    • The perfect barbecue spice rub. This rub is the perfect mix of warm and sweet spices that are essential for giving the pork its signature smoky barbecue flavor. It is also versatile enough to use with other pork recipes, especially ribs.
    • The tangy homemade barbecue sauce. The barbecue sauce is one of the things my family loves most about this recipe. It brings together the signature spices from the rub, chili, smoked paprika, and flavors from the braising liquid to create a tangy, flavorful finish that complements the pork beautifully.
    • An easy meal with options. The pulled pork is versatile enough to serve in several ways, whether piled high on a ciabatta roll or served over sweet potatoes. It also pairs easily with simple vegetables sides, making it easy to build a satisfying meal with what you have on hand.

    Slow Cooker Pulled Pork

    Slow Cooker Pulled Pork is tender, flavorful pork seasoned with a smoky spice rub, slow-cooked to perfection, and served with a tangy homemade barbecue sauce. It’s an easy meal perfect for sandwiches.
    Prep Time 20 minutes
    8 hours
    Total Time 8 hours 20 minutes
    Servings: 10
    Course: Main Course
    Cuisine: American

    Ingredients
      

    • Pulled Pork
    • 2 Tbsp brown sugar
    • 1 Tbsp smoked paprika
    • 1 Tbsp chili powder
    • 2 tsp ground cumin
    • 1 tsp salt
    • 1 tsp pepper
    • ½ tsp dry mustard
    • ½ tsp chipotle chili pepper ground or flakes
    • 3 lb boneless pork shoulder
    • 1/3 cup ketchup
    • ½ cup apple cider vinegar
    • 2 cups water
    • Barbecue Sauce
    • 3 Tbsp brown sugar
    • 2 tsp smoked paprika
    • 1 tsp chili powder
    • ½ cup ketchup
    • ¾ cup apple cider vinegar

    Equipment

    • Slow Cooker

    Method
     

    1. Pulled Pork
    2. To make the rub, combine first 8 ingredients (through chipotle chili pepper) in a small bowl.
    3. Place pork shoulder in slow cooker (lightly coated with cooking spray). Spread the rub mixture evenly all over the pork.
    4. Combine ketchup, cider vinegar, and water in a small bowl or glass measuring cup and pour around pork.
    5. Set the slow cooker to low and cook for 8 hours.
    6. Shred pork and serve with sauce.
    7. Barbecue Sauce
    8. To prepare sauce, combine ingredients in a small saucepan.
    9. Bring to a low boil and let simmer for 5 minutes.

    Notes

    The recipe above serves 8-10. However, you can use the same measurements for a pork shoulder up to 5lbs which will result in 16 servings and the same great flavor.